

How to measure for car roof leather replacement?
Leave a message

Hey there, car enthusiasts! If you're looking to give your car's interior a fresh new look, replacing the car roof leather can be a game-changer. As a car roof leather supplier, I've seen firsthand how a well-fitted and high-quality roof leather can transform the entire feel of a vehicle. In this blog post, I'm going to walk you through the process of measuring for car roof leather replacement, so you can get the perfect fit for your ride.

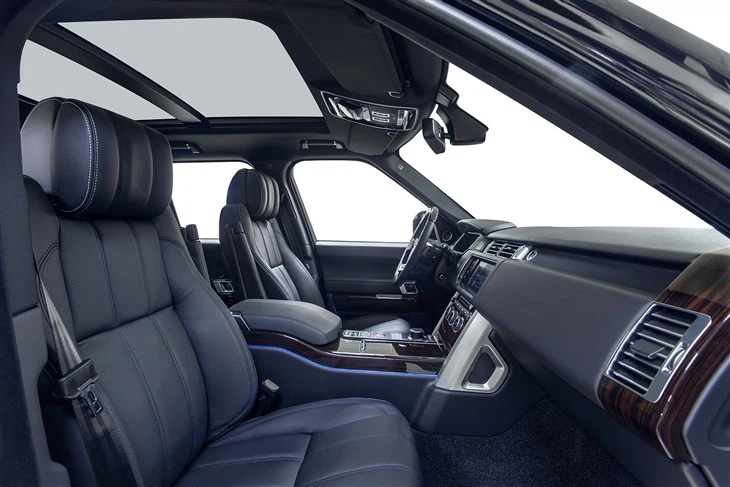
Why Measure Properly?
Before we dive into the measuring process, let's talk about why it's so important to measure accurately. When you're replacing the car roof leather, a precise fit is crucial. A poorly measured leather can result in wrinkles, sagging, or an overall unprofessional appearance. By taking the time to measure correctly, you'll ensure that your new Car Roof Leather fits like a glove, giving your car a sleek and polished look.
Tools You'll Need
To get started, you'll need a few basic tools. Here's what you'll need to have on hand:
- Measuring Tape: A flexible measuring tape is essential for getting accurate measurements. Make sure it's long enough to reach all the areas you need to measure.
- Paper and Pen: You'll need to write down your measurements as you go, so keep a piece of paper and a pen handy.
- Scissors: You may need to trim any excess leather during the installation process, so a pair of sharp scissors is a must.
- Masking Tape: Masking tape can be used to mark the areas you're measuring, making it easier to keep track of your measurements.
Step 1: Remove the Old Roof Leather
The first step in measuring for car roof leather replacement is to remove the old leather. This process may vary depending on the make and model of your car, but in general, you'll need to remove the interior trim and headliner to access the old leather. Use a trim removal tool to carefully pry off the trim pieces, and then gently pull down the headliner to expose the old leather.
Step 2: Measure the Length
Once the old leather is removed, it's time to start measuring. Begin by measuring the length of the roof from the front to the back. Use your measuring tape to measure the distance from the windshield to the rear window, following the curve of the roof. Make sure to measure in several places along the length of the roof to account for any curves or irregularities. Write down your measurements on your piece of paper.
Step 3: Measure the Width
Next, measure the width of the roof at several points along its length. Start at the front of the roof and measure the width from one side to the other, just above the windshield. Then, move to the middle of the roof and take another width measurement. Finally, measure the width at the back of the roof, just above the rear window. Again, make sure to measure in several places to account for any curves or irregularities. Write down your measurements.
Step 4: Measure the Curves
In addition to the length and width, you'll also need to measure the curves of the roof. Use your measuring tape to measure the radius of the curves at the front, middle, and back of the roof. To do this, place the measuring tape along the curve and measure the distance from the center of the curve to the edge. Write down your measurements for each curve.
Step 5: Measure the Trim Areas
Don't forget to measure the areas where the roof leather will meet the interior trim. Use your measuring tape to measure the width of the trim pieces at the front, sides, and back of the roof. Make sure to measure both the top and bottom edges of the trim pieces. Write down your measurements.
Step 6: Double-Check Your Measurements
Once you've taken all your measurements, it's important to double-check them to make sure they're accurate. Go over each measurement again, and compare them to your notes. If you notice any discrepancies, take the time to re-measure and correct them.
Step 7: Add Extra for Seams and Trim
When ordering your new car roof leather, it's a good idea to add a little extra for seams and trim. Depending on the type of leather you're using and the installation method, you may need to add an additional 2-3 inches to your measurements to allow for seams and trimming. Keep this in mind when placing your order.
Choosing the Right Leather
Now that you have your measurements, it's time to choose the right leather for your car. As a car roof leather supplier, I recommend using Perforated Microfiber Leather. This type of leather is durable, easy to clean, and has a luxurious look and feel. It's also available in a variety of colors and finishes, so you can choose the one that best matches your car's interior.
Ordering Your Leather
Once you've chosen the right leather, it's time to place your order. As a car roof leather supplier, I offer a wide range of high-quality leathers at competitive prices. Simply send me your measurements and the type of leather you want, and I'll provide you with a quote. I also offer free samples, so you can see and feel the leather before you place your order.
Installation Tips
When it's time to install your new car roof leather, here are a few tips to keep in mind:
- Clean the Surface: Before installing the new leather, make sure the surface of the roof is clean and free of any dirt, dust, or debris. Use a clean cloth and a mild cleaner to wipe down the surface.
- Use Adhesive: To ensure a secure fit, use a high-quality adhesive to attach the leather to the roof. Follow the manufacturer's instructions carefully when applying the adhesive.
- Take Your Time: Installing car roof leather can be a time-consuming process, so take your time and be patient. Make sure the leather is properly aligned and smoothed out before applying pressure to adhere it to the roof.
- Trim Excess Leather: Once the leather is installed, use your scissors to trim any excess leather along the edges. Make sure to trim the leather evenly for a professional look.
Conclusion
Measuring for car roof leather replacement may seem like a daunting task, but with the right tools and a little patience, it's a job that you can easily do yourself. By following the steps outlined in this blog post, you'll be able to get accurate measurements and choose the right leather for your car. And if you have any questions or need further assistance, don't hesitate to reach out. As a car roof leather supplier, I'm here to help you every step of the way.
If you're interested in purchasing high-quality car roof leather or other automotive leather products, such as Steering Wheel Leather, feel free to contact me. I'd be happy to discuss your needs and provide you with a quote. Let's give your car the interior upgrade it deserves!
References
- Automotive Leather Installation Guides
- Car Interior Repair Manuals


